

Why do we need offline authentication in apps?
- User Experience: Seamless access to features in areas with poor or no internet connectivity.
- Accessibility: Users can authenticate and use certain features offline when needed.
- Security: Enhances security by allowing offline access to specific features or data.
- Reduced Dependency on Servers: Provides a fallback mechanism during server outages.
- Compliance and Regulations: Meets regulatory requirements for accessibility and security.
Implementing offline authentication in flutter
Let's dive into the steps to implement offline authentication in the Flutter project. In this comprehensive guide, we'll cover the authentication in Flutter using Firebase, and implement authentication offline.
Prerequisites
- Flutter is installed on your local machine.
- Android Studio or Android SDK is installed on your local machine.
- A text editor installed, e.g., VsCode.
- Knowledge of authentication using Firebase Get-Started-Flutter-Firebase-Auth
- Basic knowledge of Flutter app development
Set up a flutter project and app
Let’s create a new Flutter project, run the following command to create a new Flutter app
flutter create myflutterapp
The command provided will create a fresh Flutter project within a directory containing your project's name, which, in this case, is myflutterapp.
cd myflutterapp
Open this in your Favorite IDE, I am using vscode. Once your project is set up the project structure will look something like this
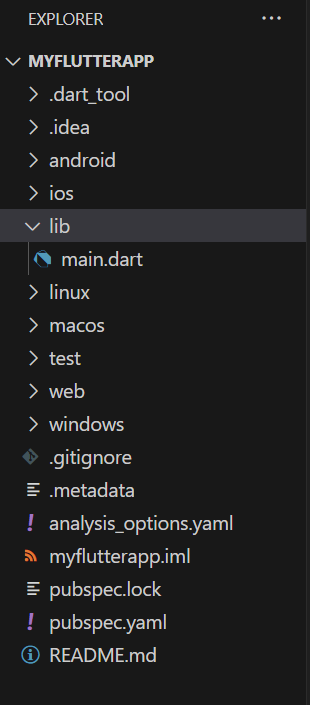
This is what a default Flutter project structure looks like.
Setup the firebase for authentication
We will be using Firebase to authenticate our Flutter app. Before setting up our project with the Firebase we need have install Firebase CLI. Using this CLI we can set up a firebase for our project.
Before using Firebase CLI we will have to log in to Firebase and run the below command to log into the Firebase.
firebase loginTo validate if the login was done successfully, run the below command
firebase projects:listThis will list all the projects that you have available in your account. Next, we have to install FlutterFire CLI, and run the below command to install the FlutterFire CLI
dart pub global activate flutterfire_cliNow, we will configure the FlutterFire to our project. Run this command to configure the FlutterFire to our newly created app
flutterfire configureHere, select your project from the list of projects and proceed. Once this is done, it will create a new file in our project with the name firebase_options.dart.
Initialize firebase in the project
Before initializing the Firebase for our project, we will have to install a few Firebase-related packages. Here are installing firebase_core, firebase_auth, and firebase_ui_auth
flutter pub add firebase_core
flutter pub add firebase_auth
flutter pub add firebase_ui_auth
Once these packages are installed, go to main.dart file and replace the main method with the below code
>>lib/main.dartvoid main() async {
WidgetsFlutterBinding.ensureInitialized();
await Firebase.initializeApp(
options: DefaultFirebaseOptions.currentPlatform,
);
runApp(const MyApp());
}WidgetsFlutterBinding.ensureInitialized()
This line prepares Flutter's binding for Firebase.
Firebase.initializeApp()
This line initializes Firebase with default platform options. This is essential for setting up Firebase services before the app starts. Also, make sure to import the firebase-related packages
import 'package:firebase_core/firebase_core.dart';
import 'package:myflutterapp/firebase_options.dart';Now we have set up our project with Firebase.
Checkpoint #1
Let us now check if we are on the right track, run the application using the below command
flutter runAfter running this command, you should see the application running on port 8000. If any port-related errors occur, ensure that port 8000 is not already in use.
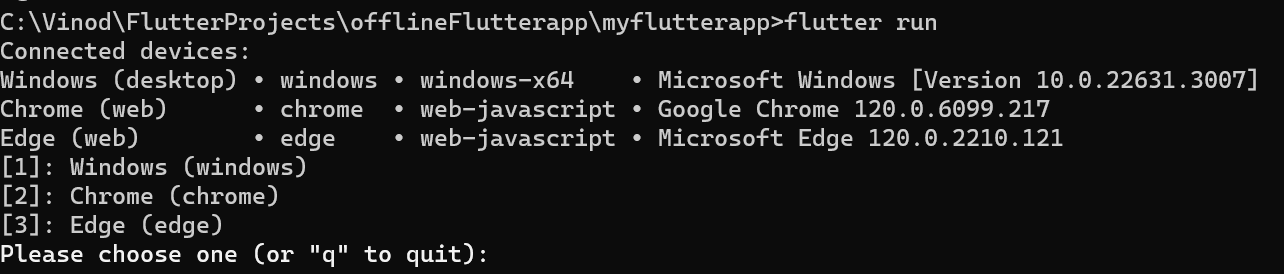
Here I am choosing Chrome to test the application, you can choose whichever you are comfortable with. After choosing your device, it will launch the application
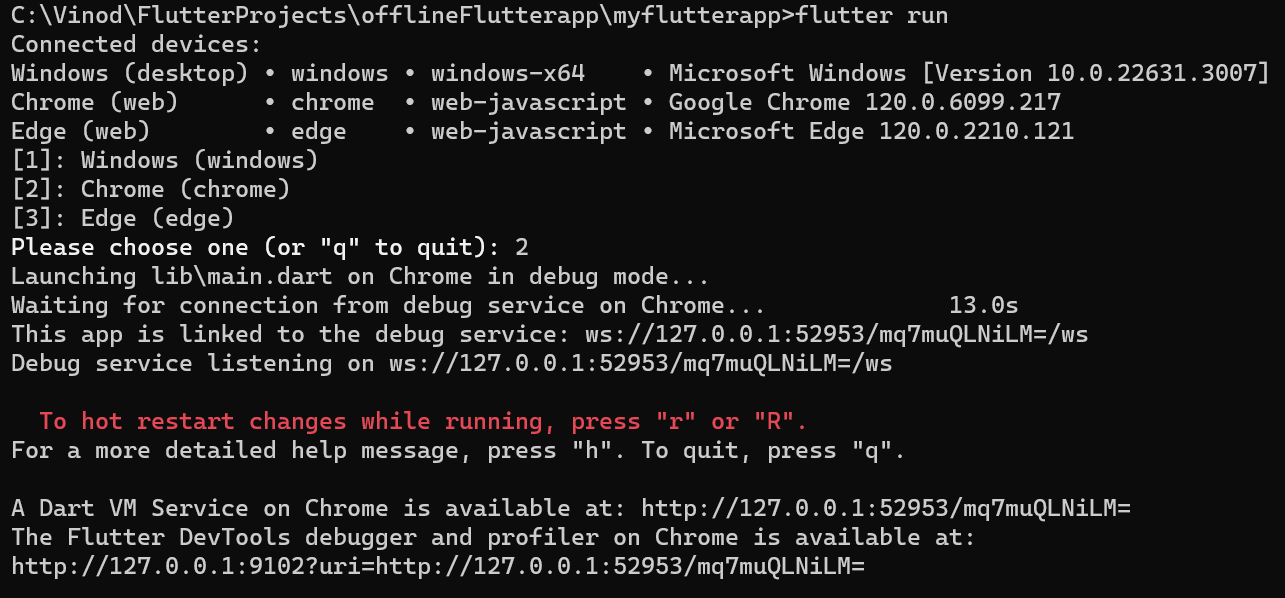
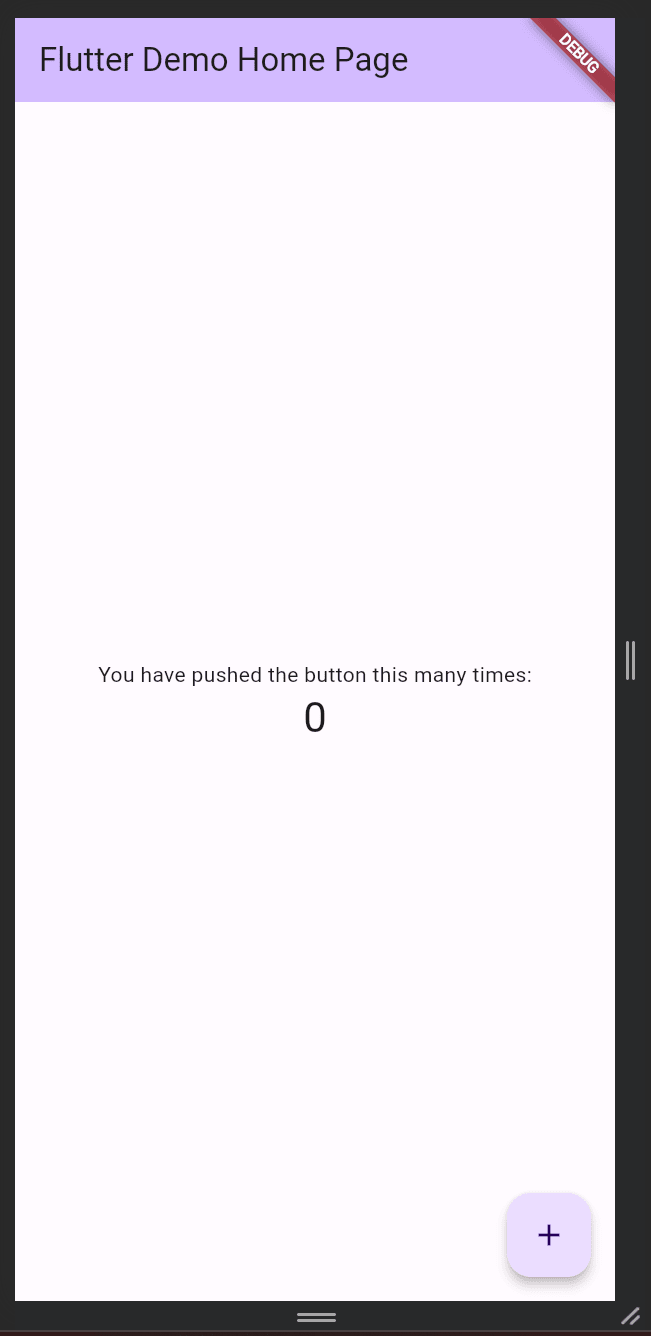
The application will look something like this in the browser
Now we have our basic project setup ready, it is time to add the relevant files to add authentication to it
Add authentication to the application
Before implementing authentication, we will refactor our code to organize it correctly
Delete all the boilerplate code from main.dart file and the below code it
lib/main.dart
import 'package:firebase_core/firebase_core.dart';
import 'package:flutter/material.dart';
import 'package:myflutterapp/app.dart';
import 'package:myflutterapp/firebase_options.dart';
void main() async {
  WidgetsFlutterBinding.ensureInitialized();
  await Firebase.initializeApp(
    options: DefaultFirebaseOptions.currentPlatform,
  );
  runApp(const MyApp());
}Now, let's create a new file in the lib folder name it as app.dart, and add the below code to it
lib/app.dart
import 'package:flutter/material.dart';
import 'package:myflutterapp/login_screen.dart';

class MyApp extends StatelessWidget {
  const MyApp({super.key});
  @override
  Widget build(BuildContext context) {
    return MaterialApp(
      title: 'My Flutter App',
      home: LoginScreen(),
    );
  }
}
Here we are defining a simple app structure named "My Flutter App" with a starting screen set to login screen. The MyApp class is a stateless widget representing the overall app.
It’s time to add a login screen to our project, create a new file name login_screen.dart, and add the below code to it
lib/login_screen.dart
import 'package:firebase_auth/firebase_auth.dart';
import 'package:flutter/material.dart';
import 'package:myflutterapp/authenticate.dart';
import 'package:myflutterapp/home.dart';

class LoginScreen extends StatelessWidget {
final TextEditingController emailController = TextEditingController();
final TextEditingController passwordController = TextEditingController();

  LoginScreen({super.key});

  @override
  Widget build(BuildContext context) {
    return Scaffold(
      appBar: AppBar(
        title: const Text('My Flutter App'),
      ),
      body: Container(
        decoration: const BoxDecoration(
          color: Colors.blueGrey,
        ),
        child: Padding(
          padding: const EdgeInsets.all(16.0),
          child: Column(
            mainAxisAlignment: MainAxisAlignment.center,
            children: [
              TextField(
                controller: emailController,
                decoration: InputDecoration(
                  labelText: 'Email',
                  filled: true,
                  fillColor: Colors.white,
                  border: OutlineInputBorder(
                    borderRadius: BorderRadius.circular(12.0),
                  ),
                ),
              ),
              const SizedBox(height: 16),
              TextField(
                controller: passwordController,
                decoration: InputDecoration(
                  labelText: 'Password',
                  filled: true,
                  fillColor: Colors.white,
                  border: OutlineInputBorder(
                    borderRadius: BorderRadius.circular(12.0),
                  ),
                ),
                obscureText: true,
              ),
              const SizedBox(height: 32),
              ElevatedButton(
                onPressed: () async {
                  String email = emailController.text;
                  String password = passwordController.text;
                  try {
                    AuthResponse? user =
                        await Authentication.authenticate(email, password);

                    if (user != null && user.isAuthenticated) {
                      Navigator.pushReplacement(
                        context,
                        MaterialPageRoute(
                          builder: (context) => const MyHomePage(
                            title: "My Flutter App",
                          ),
                        ),
                      );
                    } else {
                      SnackBar snackBara = SnackBar(
                        content: Text(
                          user!.message,
                          style: const TextStyle(fontSize: 16),
                        ),
                        backgroundColor: Colors.red,
                      );

                      ScaffoldMessenger.of(context).showSnackBar(snackBara);
                    }
                  } on FirebaseAuthException catch (e) {
                    print("Error: ${e.message}");
                    const snackBar = SnackBar(
                      content: Text(
                        'Authentication failed. Please check your credentials.',
                        style: TextStyle(fontSize: 16),
                      ),
                      backgroundColor: Colors.red,
                    );

                    ScaffoldMessenger.of(context).showSnackBar(snackBar);
                  }
                },
                style: ElevatedButton.styleFrom(
                  primary: Colors.green,
                  shape: RoundedRectangleBorder(
                    borderRadius: BorderRadius.circular(12.0),
                  ),
                  padding:
                      const EdgeInsets.symmetric(horizontal: 50, vertical: 20),
                ),
                child: const Text(
                  'Login',
                  style: TextStyle(fontSize: 18),
                ),
              ),
            ],
          ),
        ),
      ),
    );
  }
}
Here we have created a simple login screen with Firebase authentication. Utilizing the firebase_auth and flutter/material.dart dependencies, we have added text input fields for email and password, styled with rounded corners. A login button triggers Firebase authentication, providing user feedback through SnackBars. Successful logins navigate to the home page, while authentication failures prompt error messages.
Now, let’s create a file for authentication, name it authenticate.dart, and add the below code to it
lib/authenticate.dart
import 'package:firebase_auth/firebase_auth.dart';

class Authentication {
  static Future<AuthResponse?> authenticate(
      String email, String password) async {
    // Online authentication with Firebase
    try {
      UserCredential userCredential = await FirebaseAuth.instance
          .signInWithEmailAndPassword(email: email, password: password);
      return AuthResponse(
          username: email,
          userDetails: userCredential.user,
          isAuthenticated: true,
          message: "Login Success");
    } on FirebaseAuthException catch (e) {
      // Handle authentication errors
      print("Error: ${e.message}");
      return AuthResponse(
          username: email, isAuthenticated: false, message: e.message!);
    }
  }
}

class AuthResponse {
  final String username;
  final User? userDetails;
  final bool isAuthenticated;
  final String message;

  AuthResponse(
      {required this.username,
      this.userDetails,
      required this.isAuthenticated,
      required this.message});
}
Here, we created an authentication class in Dart, utilizing the Firebase Authentication package. The Authentication class encapsulated authentication functionality, featuring a static method named authenticate. This method handled the user sign-in process by taking email and password parameters.
Within the authenticate method, Firebase's signInWithEmailAndPassword is added to sign in the user. Upon successful sign-in, an AuthResponse object is generated. This object included details like the username (email), user specifics, authentication status (set to true), and a success message.
In the event of authentication errors, caught through a FirebaseAuthException, the error message is printed to the console for debugging purposes. Subsequently, an AuthResponse object is created, incorporating the username, authentication status set to false, and the error message.
The AuthResponse class holds information regarding the authentication result, encompassing the username, user details, authentication status, and a message. This class is returned by the authenticate method to furnish details about the concluded authentication process.
Finally, let's create a home page where we will redirect our users after a successful login.
Create a new file and name it home.dart and add the below code to it
lib/home.dart
import 'package:flutter/material.dart';
import 'package:myflutterapp/login_screen.dart';
class MyHomePage extends StatefulWidget {
const MyHomePage({super.key, required this.title});
final String title;
@override
State<MyHomePage> createState() => _MyHomePageState();
}
class _MyHomePageState extends State<MyHomePage> {
@override
Widget build(BuildContext context) {
return Scaffold(
appBar: AppBar(
backgroundColor: Theme.of(context).colorScheme.inversePrimary,
title: Text(widget.title),
actions: [
Padding(
padding: const EdgeInsets.all(8.0),
child: ElevatedButton(
onPressed: () async {
Navigator.pushReplacement(
context,
MaterialPageRoute(builder: (context) => LoginScreen()),
);
},
style: ElevatedButton.styleFrom(
primary: Colors.red, // Change the color as needed
onPrimary: Colors.white,
),
child: const Text('Log Out'),
),
),
],
),
body: Center(
child: Container(
padding: const EdgeInsets.all(16.0),
child: const Column(
mainAxisAlignment: MainAxisAlignment.center,
crossAxisAlignment: CrossAxisAlignment.center,
children: <Widget>[
Text(
'Welcome to the Cool App!',
style: TextStyle(
fontSize: 24,
fontWeight: FontWeight.bold,
),
textAlign: TextAlign.center,
),
SizedBox(height: 20),
Text(
'Explore the amazing features and enjoy your experience.',
textAlign: TextAlign.center,
style: TextStyle(fontSize: 16, color: Colors.grey),
),
],
),
),
),
);
}
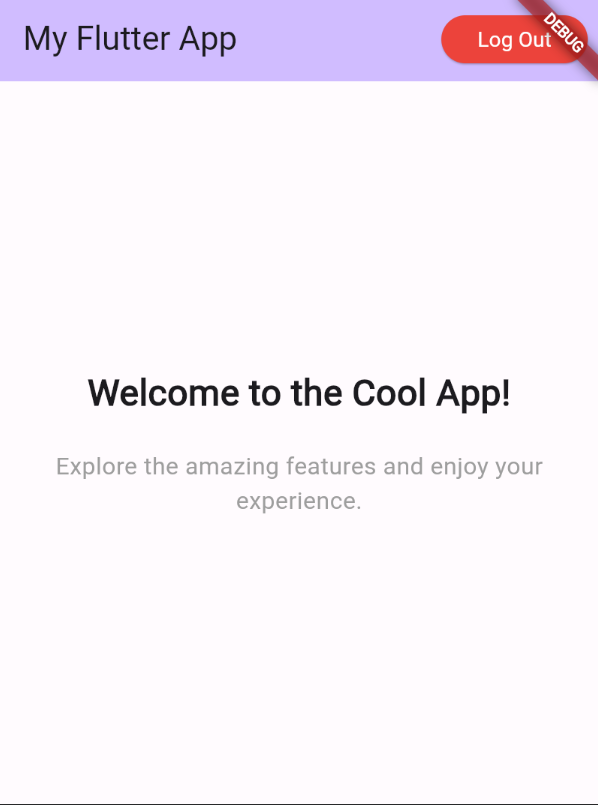
}Here, we defined a stateful widget called MyHomePage. The widget takes a title as a parameter and creates a state associated with it. The home page includes an app bar with a title and a "Log Out" button in the app bar's actions. Clicking the "Log Out" button triggers navigation to the login screen using Navigator.pushReplacement.
The body of the home page consists of a centered container containing a column of text widgets. The text widgets provide a welcome message and a brief description of the app's features. The app bar has a custom background color obtained from the theme.
Checkpoint #2
With the authentication integrated into our Flutter app, it's time to conduct a test. Run the application, and you should now see the login screen, as seen below.
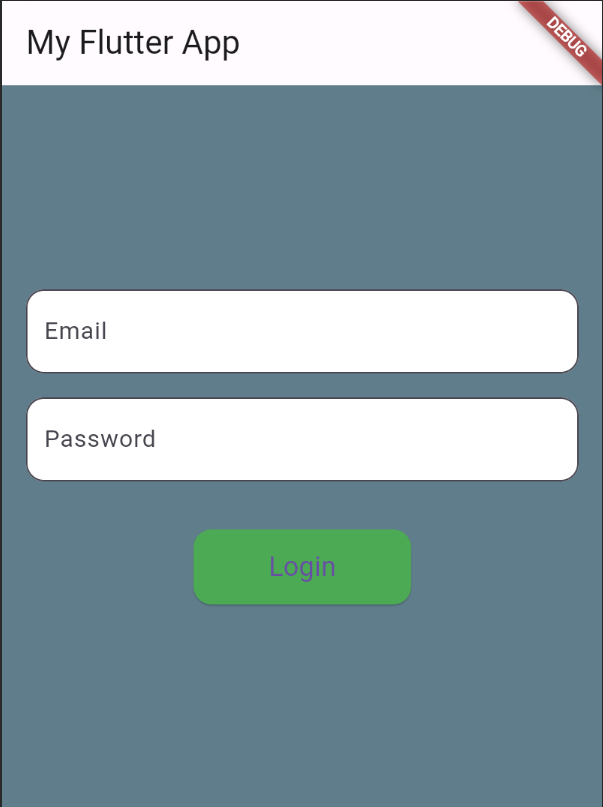
Enter the credentials that you have registered in the Firebase.
If you do not have users created then you can follow these steps to create a new user with email authentication from the Firebase console:
- Navigate to Firebase Console: Firebase Console
- Go to the Firebase Console.
- Select the project you're working on
- Access Users Table:
- On the left-hand side, click on "Authentication."
- In the sub-menu, click on "Users."
- Add a New User:
- Once you're on the "Users" page, click the "Add user" button.
- Enter User Details:
- In the pop-up window, enter the user's email address and password.
- The email and password can be temporary or fake, but it's essential to remember them if you want to test the sign-in functionality.
- Note: If you use a fake email address, the "Forgot password" functionality won't work.
- Click "Add user":
- After entering the user details, click on the "Add user" button to create the new user.
- Verify User Creation:
- You should now see the newly created user in the list on the "Users" page.
After successful login you will see the home page like this:
- You should now see the newly created user in the list on the "Users" page.
Installing the dependencies for offline authentication
To implement offline authentication, we will be using the conneticityplus package, this package will help us to identify whether the user is offline or online.
Read more about this package here
https://pub.dev/packages/connectivity_plus
To install the package, run the below command
flutter pub add connectivity_plusWe will also be using flutter_scure_store to securely store the credentials Read more about this package here https://pub.dev/packages/flutter_secure_storage To install the package, run the below command
flutter pub add flutter_secure_storageAdd the secure storage
Create a new file and name it as secure_storage.dart
lib/secure_storage.dart
import 'package:flutter_secure_storage/flutter_secure_storage.dart';

class SecureStorage {
  // Create storage
  final storage = const FlutterSecureStorage();

  final String _keyUserName = 'username';
  final String _keyPassWord = 'password';

  Future setUserName(String username) async {
    await storage.write(key: _keyUserName, value: username);
  }

  Future<String?> getUserName() async {
    return await storage.read(key: _keyUserName);
  }

  Future setPassWord(String password) async {
    await storage.write(key: _keyPassWord, value: password);
  }

  Future<String?> getPassWord() async {
    return await storage.read(key: _keyPassWord);
  }
}
Here, a class named SecureStorage is defined to handle secure storage using the FlutterSecureStorage package. The class contains methods to set and retrieve a username and password securely. It utilizes the FlutterSecureStorage instance to write and read data securely. Two private constants, _keyUserName and _keyPassWord, represent the keys for storing the username and password, respectively. The class provides methods such as setUserName, getUserName, setPassWord, and getPassWord to interact with the secure storage for managing user credentials.
Handle offline authentication
Now we will first check whether the user is offline or not. If the user is online we will proceed with Firebase authentication otherwise we validate the credentials with the secured storage credentials.
lib/authenticate.dart
 import 'package:connectivity_plus/connectivity_plus.dart';
import 'package:firebase_auth/firebase_auth.dart';
import 'package:myflutterapp/secure_storage.dart';
class Authentication {
  static Future<bool> isOnline() async {
    var connectivityResult = await Connectivity().checkConnectivity();
    return connectivityResult != ConnectivityResult.none;
  }

  static Future<AuthResponse?> authenticate(
      String email, String password) async {
    if (await isOnline()) {
      // Online authentication with Firebase
      try {
        UserCredential userCredential = await FirebaseAuth.instance
            .signInWithEmailAndPassword(email: email, password: password);
        return AuthResponse(
            username: email,
            userDetails: userCredential.user,
            isAuthenticated: true,
            message: "Login Success");
      } on FirebaseAuthException catch (e) {
        // Handle authentication errors
        print("Error: ${e.message}");
        return AuthResponse(
            username: email, isAuthenticated: false, message: e.message!);
      }
    } else {
      String? securedUsername = await SecureStorage().getUserName();
      String? securedPasswoed = await SecureStorage().getPassWord();
      if (securedPasswoed == password && securedUsername == email) {
        return AuthResponse(
            username: email,
            isAuthenticated: true,
            message: "Logged in successfully");
      } else {
        return AuthResponse(
            username: email,
            isAuthenticated: false,
            message:
                "Incorrect credentials! you may reset the password after you are online!");
      }
    }
  }
}

class AuthResponse {
  final String username;
  final User? userDetails;
  final bool isAuthenticated;
  final String message;

  AuthResponse(
      {required this.username,
      this.userDetails,
      required this.isAuthenticated,
      required this.message});
}
Here we first have added a method isOnline() this method checks if currently our user is offline or online.
 static Future<bool> isOnline() async {
    var connectivityResult = await Connectivity().checkConnectivity();
    return connectivityResult != ConnectivityResult.none;
  }
Then if the user is Offline, we validate the entered credentials with credentials stored in secure storage. If the credentials match, then we redirect users to the Home screen, else we present an incorrect password error.
Next, we will have to store the credentials in the secure storage when the user logs in while they are online.
lib/login_screen.dart
 import 'package:firebase_auth/firebase_auth.dart';
import 'package:flutter/material.dart';
import 'package:myflutterapp/authenticate.dart';
import 'package:myflutterapp/home.dart';
import 'package:myflutterapp/secure_storage.dart'; //Importing the secure storage class

class LoginScreen extends StatelessWidget {
  final TextEditingController emailController = TextEditingController();
  final TextEditingController passwordController = TextEditingController();
  final SecureStorage _secureStorage = SecureStorage();//Initializing the SecureStorage class to use it later

  LoginScreen({super.key});

  @override
  Widget build(BuildContext context) {
    return Scaffold(
      appBar: AppBar(
        title: const Text('My Flutter App'),
      ),
      body: Container(
        decoration: const BoxDecoration(
          color: Colors.blueGrey,
        ),
        child: Padding(
          padding: const EdgeInsets.all(16.0),
          child: Column(
            mainAxisAlignment: MainAxisAlignment.center,
            children: [
              TextField(
                controller: emailController,
                decoration: InputDecoration(
                  labelText: 'Email',
                  filled: true,
                  fillColor: Colors.white,
                  border: OutlineInputBorder(
                    borderRadius: BorderRadius.circular(12.0),
                  ),
                ),
              ),
              const SizedBox(height: 16),
              TextField(
                controller: passwordController,
                decoration: InputDecoration(
                  labelText: 'Password',
                  filled: true,
                  fillColor: Colors.white,
                  border: OutlineInputBorder(
                    borderRadius: BorderRadius.circular(12.0),
                  ),
                ),
                obscureText: true,
              ),
              const SizedBox(height: 32),
              ElevatedButton(
                onPressed: () async {
                  String email = emailController.text;
                  String password = passwordController.text;
                  try {
                    AuthResponse? user =
                        await Authentication.authenticate(email, password);

                    if (user != null && user.isAuthenticated) {
                //After successful login we are storing the
            // the credentials to the secured storage
                      await _secureStorage.setUserName(email);
                      await _secureStorage.setPassWord(password);

                      Navigator.pushReplacement(
                        context,
                        MaterialPageRoute(
                          builder: (context) => const MyHomePage(
                            title: "My Flutter App",
                          ),
                        ),
                      );
                    } else {
                      SnackBar snackBara = SnackBar(
                        content: Text(
                          user!.message,
                          style: const TextStyle(fontSize: 16),
                        ),
                        backgroundColor: Colors.red,
                      );

                      ScaffoldMessenger.of(context).showSnackBar(snackBara);
                    }
                  } on FirebaseAuthException catch (e) {
                    print("Error: ${e.message}");
                    const snackBar = SnackBar(
                      content: Text(
                        'Authentication failed. Please check your credentials.',
                        style: TextStyle(fontSize: 16),
                      ),
                      backgroundColor: Colors.red,
                    );

                    ScaffoldMessenger.of(context).showSnackBar(snackBar);
                  }
                },
                style: ElevatedButton.styleFrom(
                  primary: Colors.green,
                  shape: RoundedRectangleBorder(
                    borderRadius: BorderRadius.circular(12.0),
                  ),
                  padding:
                      const EdgeInsets.symmetric(horizontal: 50, vertical: 20),
                ),
                child: const Text(
                  'Login',
                  style: TextStyle(fontSize: 18),
                ),
              ),
            ],
          ),
        ),
      ),
    );
  }
}
Here, we are securely storing the user's email and password using an instance of the SecureStorage class.
await _secureStorage.setUserName(email);
await _secureStorage.setPassWord(password);
These lines were executed after a successful authentication attempt, where the user's credentials were verified using the Authentication.authenticate method. If the authentication was successful, the user's email and password were stored securely using the _secureStorage instance, presumably for later use in the application. This secure storage approach enhanced the security of sensitive user information.
Testing and debugging
To run the application in the offline mode, open the Chrome dev tools, go to the network tab, and change throttling to offline. Now our application will run in the offline mode.

Now, while being in offline mode try to log in and you will see authentication happening correctly.
You can also install the application on your device and then try to log in online mode and then log out. After that, you can turn off the internet connection and try to log in while being offline.
This is it; you have now successfully implemented offline authentication in your Flutter app.
Alternate approaches
The need for alternate approaches in offline authentication arises from the diverse security requirements and policies that vary across companies and applications. Here are some alternate approaches that you can follow depending on your use case and scenarios:
Hashing and salting passwords:
Instead of storing plain passwords in secure storage, consider hashing and salting them before storage. This adds an extra layer of security by transforming the password into a unique hash using a salt key. Hashed passwords are more resistant to unauthorized access, even if the secure storage is compromised.
Biometric authentication:
Implementing biometric authentication, such as fingerprint or face recognition, provides an additional layer of security. Biometric authentication can function both offline and online, making it a robust solution for user verification. However, integrating biometric features may require additional development effort.
Time-limited token authentication:
Use time-limited authentication tokens that are generated and stored securely during online authentication. These tokens expire after a certain period, enhancing security. In offline mode, the app can validate the token's expiration locally, allowing users to access specific features without requiring server connectivity.
Device-level encryption:
Leverage device-level encryption to secure sensitive data stored on the device. This ensures that even if the device is compromised, the stored authentication information remains encrypted and protected. Integrating device-level encryption adds an extra security layer to offline authentication.
Conclusion
Offline authentication plays a crucial role in enhancing the user experience, accessibility, and security of Flutter applications, especially in scenarios with limited or no internet connectivity. The ability to authenticate users offline ensures uninterrupted access to app features, reduces dependency on servers, and complies with regulatory standards.
In this comprehensive guide, we explored the implementation of offline authentication in Flutter projects using Firebase Authentication. The step-by-step process involved setting up a Flutter project, configuring Firebase for authentication, and integrating the necessary dependencies like connectivity_plus and flutter_secure_storage. We organized the code structure, created a login screen, and implemented a secure storage mechanism for user credentials. The offline authentication logic was incorporated, allowing users to log in securely even when offline, with credentials verified using local storage. This approach not only ensures a seamless user experience but also adds an extra layer of security to the authentication process. Consideration of alternate approaches, such as hashing passwords and implementing biometric authentication,