Why is WordPress still relevant?
Introduced as a blogging platform in 2003, WordPress has undergone a remarkable evolution, emerging as the most famous content management system (CMS). Although it is hard to get precise numbers, a couple of studies estimate that WordPress is the backbone of an impressive 810 million websites, constituting a remarkable 43% of all websites on the internet. Furthermore, WordPress dominates the CMS market with a commanding 63% share, surpassing its closest competitor by more than 10 times.
Its enduring relevance is attributed to its adaptability and user-friendly interface, making it an accessible choice for a diverse range of users. The platform's transformation into a comprehensive CMS is marked by its capacity to cater to both beginners and seasoned developers.
The extensive theme and plugin ecosystem further solidifies WordPress's position as a favored CMS. With thousands of available themes and plugins, users have the tools to customize their websites extensively. This flexibility is a cornerstone of WordPress's continued popularity, as it empowers users to tailor their online presence according to their unique needs and preferences.
Why create a WordPress plugin?
Why bother creating a custom WordPress plugin when there are already over 60,000 plugins available? The answer lies in the unique needs of individual websites or businesses that may not be fully met by existing solutions.
One compelling reason to embark on this customization journey is to achieve unique functionality that aligns precisely with the requirements of a particular website or business. While the WordPress plugin repository boasts an extensive collection of plugins, some projects demand features that are not readily available off the shelf. For instance, a business with distinct workflow processes or intricate integrations with external services may find it more efficient to develop a custom plugin to ensure seamless compatibility and optimal performance.
Looking at it from a different perspective, some plugins come with a price tag. Depending on the development expertise within a team, opting to create a custom plugin with similar functionality to a paid one becomes a viable option. Alternatively, developers may choose to go a step further, creating a standout plugin with unique features and then exploring avenues for monetization. In the realm of custom WordPress plugins, the possibilities extend beyond mere functionality, offering an opportunity for innovation, cost-effectiveness, and even potential revenue generation.
Development environment
Before diving into plugin development, let’s sort out some things about the environment.
First, let’s understand the distinction between WordPress.org and WordPress.com.
There is WordPress.org (or simply WordPress), which is a content management system, written in PHP, available as open-source software. This means that you can use it for free, without the burden of licensing fees. You can run it locally or host it on the web, using any cloud service you choose.
Then, there is WordPress.com, a web hosting service and platform for website creation built on WordPress software. It offers a variety of plans, most of them paid, to host your project online. It is important to emphasize that, by choosing the paid plans, you wouldn’t be charged for using the WordPress engine itself, but for other related services, like hosting (server space and computer power), custom domains, support, firewall, etc.
There is a free tier on WordPress.com, but unfortunately, it does not allow the installation of plugins, so it’s not a good option.
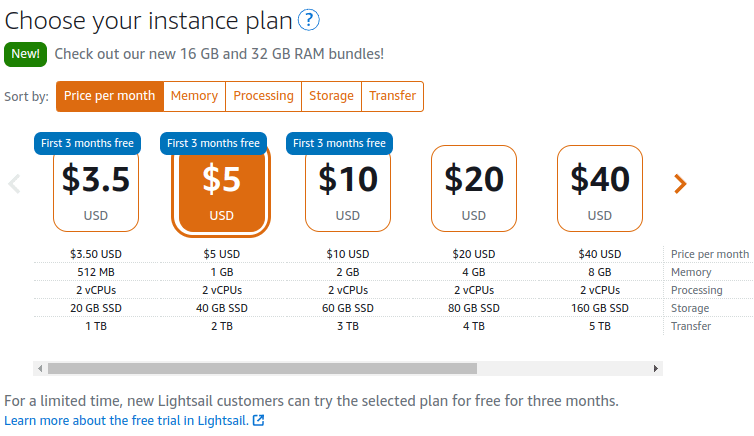
For development purposes, it is fine to run it locally. But, if you prefer to host it online, there are budget-friendly services available, often starting at around US$5 per month. For example, you can experiment with AWS Lightsail, which offers WordPress blueprints that are easy to configure and you’ll get the first three months for free.

How to create a plugin
In this section, we will learn the basics of WordPress plugin development and create a simple plugin that shows the IP address and user agent from the last visitors of the website. We won’t get as far as determining the geolocation of these users, but this logical next step can be left as an exciting opportunity for readers to expand on this project.
Plugin basics
The very minimum you need to do to create a plugin is to have a PHP file, with a header, inside the plugin directory. On a Unix-like command line, the process looks like this:
cd /path/to/wordpress/wp-content/plugins
mkdir visitors
cd visitors
touch visitors.php
This will create a folder called visitors and a visitors.php file inside. Let’s populate this file with a WordPress plugin header comment. This is what makes WordPress recognize that a file is a plugin. The Plugin Name is the only required parameter, but let’s fill in a few more fields. Use your favorite editor to edit this file:
<?php

/**
* @package JV_Visitors
* @version 1.0.0s
*/
/*
   Plugin Name: Visitors
   Plugin URI:  http://wordpress.org/plugins/jvvisitors/
   Description: Display IP, user agent and referrer of the website visitors
   Author:      Jerome Vonk
   Version:     1.0.0
   Author URI:  http://jeromevonk.github.io
   License: GPL v2 or later
   License URI: https://www.gnu.org/licenses/gpl-2.0.html
*/
In this example, the plugin will have a single file. if the plugin has multiple PHP files, only one of those files should have the header comment.
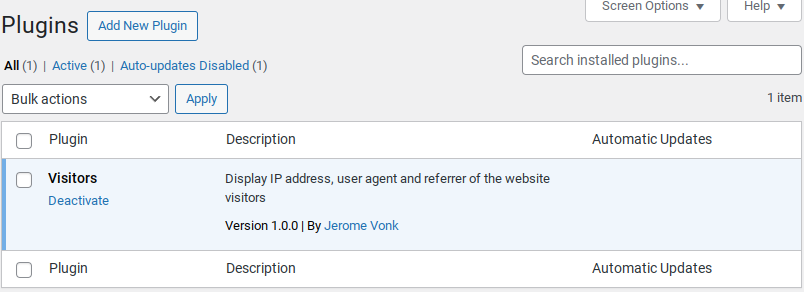
After saving the file, you should see your plugin listed on your admin panel. Log in to your WordPress site and click Plugins on the navigation pane:

Saving data
WordPress API provides functions like get_option() and update_option() that can save and retrieve data from the WordPress database, in a particular table called wp_options. This table is a key-value store where WordPress core, themes, plugins, and custom code can store and retrieve various settings and options.
In our plugin, we will take advantage of this functionality to store a sample of IP addresses for the last visitors of a website.
The following code snippet shows how we can use these functions to update our list of visitors each time someone visits the website:
function store_visitor_info($ip, $user_agent, $referer, $date )
{
 $visitor_data = array(
   'ip' => $ip,
   'user_agent' => $user_agent,
   'referer' => $referer,
   'date' => $date,
 );

 // Get array of visitors
 $last_visitors = get_option('last_visitors', array());

 // Prepend new visitor to the beginning
 array_unshift($last_visitors, $visitor_data);

 // Update array
 update_option('last_visitors', $last_visitors);
}
Keep in mind that the get_option() function is a convenient way to retrieve configuration settings and other data, but it is not designed for complex queries or large-scale data retrieval. For more advanced data operations, direct database queries or custom tables might be more suitable.
Hooks
Now, let’s make our plugin more interesting by actually doing something. Our goal is to add a top-level menu page on the admin menu. When visiting this page, the website’s admin will have access to the IP address, user agent, and referrer of the last website visitors.
To achieve this, we will take advantage of Hooks. As WordPress describes it, Hooks are a way for one piece of code to interact/modify another piece of code at specific, pre-defined spots.
There are two types of hooks:
-Actions are events triggered at specific points in the execution of a WordPress page or process. When you attach a function to an action hook, that function will be executed when the action occurs. Actions allow you to add, modify, or remove functionality at various points in the WordPress workflow.
-Filters, on the other hand, allow you to modify data before it is sent to the database or displayed on the screen. You attach a function to a filter hook, and that function will receive the data, allow you to modify it, and then pass it along.
Admin menu
In our scenario, the first hook we are looking for is the admin_menu, which is an action. Using it, we can add a callback function before the administration menu loads on the admin page.
Inside our callback function, we are simply calling the add_menu_page() function, provided by WordPress API. The parameters are described in the following code snippet:
function custom_admin_menu_item()
{
   add_menu_page(
       'Visitors',            // Page Title
       'Visitors',            // Menu Title
       'manage_options',      // Capability
       'visitors',            // Menu Slug
       'visitors_admin_page', // Callback function to display the page
       'dashicons-airplane'   // URL to the icon
   );
}

add_action('admin_menu', 'custom_admin_menu_item');
The 5th parameter is a callback function that will actually display data on the page. We will see it in detail later.
WP Loaded
The second hook we need is wp_loaded, which is an action. This hook is fired after the WordPress core has been loaded but before the output is sent to the browser.
Inside our callback function, we are doing three things:
a)Getting IP address, user agent, and referrer from the web server headers;
b)Getting the list of visitors;
c)Prepending the new visitor to the beginning of the list.
function store_visitor_info()
{
   // Get the visitor's IP address from the HTTP_X_FORWARDED_FOR header if available
   $ip = isset($_SERVER['HTTP_X_FORWARDED_FOR']) ? sanitize_text_field($_SERVER['HTTP_X_FORWARDED_FOR']) : '';

   // If the header is not set, fall back to REMOTE_ADDR
   if (empty($ip)) {
       $ip = isset($_SERVER['REMOTE_ADDR']) ? sanitize_text_field($_SERVER['REMOTE_ADDR']) : '';
   }

   // Ensure the IP address is valid
   if (filter_var($ip, FILTER_VALIDATE_IP)) {
       $user_agent = isset($_SERVER['HTTP_USER_AGENT']) ? sanitize_text_field($_SERVER['HTTP_USER_AGENT']) : 'Unknown';
       $referer = isset($_SERVER['HTTP_REFERER']) ? esc_url($_SERVER['HTTP_REFERER']) : 'Direct visit';
       $date = current_time('mysql');

       $visitor_data = array(
           'ip' => $ip,
           'user_agent' => $user_agent,
           'referer' => $referer,
           'date' => $date,
       );

       $last_visitors = get_option('last_visitors', array());

       // Limit the number of stored visitor data to 50
       $limit = 50;
       array_unshift($last_visitors, $visitor_data);
       $last_visitors = array_slice($last_visitors, 0, $limit);

       update_option('last_visitors', $last_visitors);
   }
}
add_action('wp_loaded', 'store_visitor_info');
Displaying the page
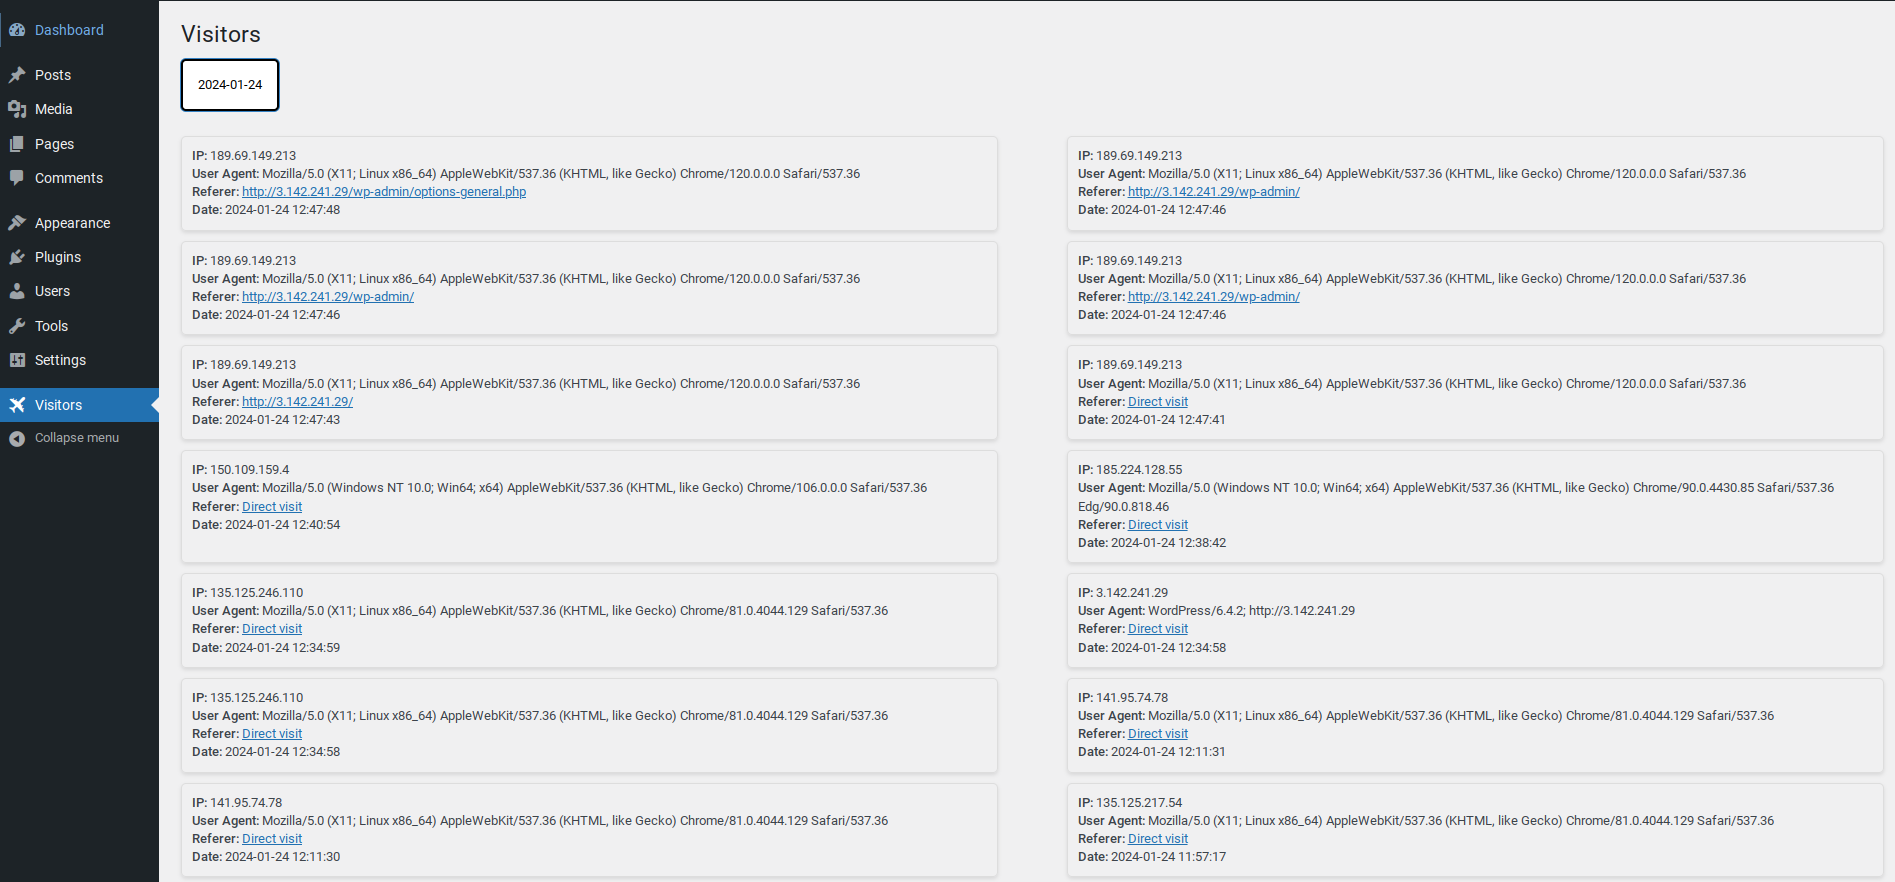
The final step is to show visitors’s information to the admin when they visit the custom page created by our plugin. Here’s a screenshot of the page on production:

Let’s check out what’s happening on this page:
- Data Retrieval: The visitor's data is obtained using the get_option() function.
- Grouping by Day: The collected visitor data is organized by the day of their visit.
- Button Display: For each unique visit day, a button is dynamically generated at the top of the page.
- Styling with CSS: CSS is applied to enhance the visual presentation, creating a clean and user-friendly interface.
- Visibility: Initially, all visitor data is hidden from view.
- JavaScript Interaction: Utilizing JavaScript, an interactive feature is implemented: clicking on a date button triggers the display of visitor data for that specific day. This dynamic functionality enhances the user experience by providing relevant information on demand.
The source code of the page is:
function visitors_admin_page()
{
   $last_visitors = get_option('last_visitors', array());

   echo '<div class="wrap">';
   echo '<h2>Visitors</h2>';

   // Enqueue styles
   echo '<style>';
   echo '.visitor-list { display: none; flex-wrap: wrap; justify-content: space-between; }';
   echo '.visitor-item { width: 48%; box-sizing: border-box; border: 1px solid #ddd; padding: 10px; margin-bottom: 10px; border-radius: 5px; box-shadow: 0 2px 4px rgba(0, 0, 0, 0.1); }';
   echo '.date-buttons-container { margin-bottom: 20px; }';
   echo '#visitor-container .date-button { background-color: #fff; color: #000; padding: 10px 15px; margin: 5px 5px 5px 0; border: 2px solid #000; border-radius: 5px; cursor: pointer; }';
   echo '#visitor-container .date-button:hover { background-color: #f5f5f5; }';
   echo '</style>';

   // Group visitors by date
   $grouped_visitors = array();
   foreach ($last_visitors as $visitor_data) {
       $date = date('Y-m-d', strtotime($visitor_data['date']));
       $grouped_visitors[$date][] = $visitor_data;
   }

   if (!empty($grouped_visitors)) {
       echo '<div id="visitor-container">';

       // Display buttons for each day
       echo '<div class="date-buttons-container">';
       foreach (array_keys($grouped_visitors) as $date) {
           echo '<button class="date-button button" data-date="' . esc_attr($date) . '">' . esc_html($date) . '</button>';
       }
       echo '</div>';

       // Display visitors for each day
       foreach ($grouped_visitors as $date => $visitors) {
           echo '<div class="visitor-list" id="visitor-list-' . esc_attr($date) . '">';
           foreach ($visitors as $visitor_data) {
               echo '<div class="visitor-item">';
               echo '<strong>IP:</strong> ' . esc_html($visitor_data['ip']) . '<br>';
               echo '<strong>User Agent:</strong> ' . esc_html($visitor_data['user_agent']) . '<br>';
               echo '<strong>Referer:</strong> <a href="' . esc_url($visitor_data['referer']) . '">' . esc_html($visitor_data['referer']) . '</a><br>';
               echo '<strong>Date:</strong> ' . esc_html($visitor_data['date']);
               echo '</div>';
           }
           echo '</div>';
       }

       echo '</div>';

       // Enqueue JavaScript
       echo '<script>';
       echo 'document.addEventListener("DOMContentLoaded", function() {';
       echo '  var dateButtons = document.querySelectorAll(".date-button");';
       echo '  var visitorLists = document.querySelectorAll(".visitor-list");';
       echo '  dateButtons.forEach(function(button) {';
       echo '    button.addEventListener("click", function() {';
       echo '      var selectedDate = this.getAttribute("data-date");';
       echo '      visitorLists.forEach(function(list) {';
       echo '        list.style.display = (list.id === "visitor-list-" + selectedDate) ? "flex" : "none";';
       echo '      });';
       echo '    });';
       echo '  });';
       echo '});';
       echo '</script>';
   } else {
       echo '<p>No visitor data available.</p>';
   }

   echo '</div>';
}
How to publish your plugin
If you want to make your plugin publicly available, you can list it in the plugin directory. These are the necessary steps:
- Create an account on WordPress.org;
- Create a readme.txt file according to this format;
- Zip it and submit it for review;
- Once approved, you’ll receive credentials to a Subversion repository where you’ll store your plugin deliverables;
- After uploading to the repository, it will automatically display in the plugin browser.
Resources
- Introduction to plugin Development By WordPress
- Hosting your plugin on *WordPress.org
- WordPress APIs
- Introduction to plugin Development By WordPress

