
Prerequisites
Before diving into OAuth authentication with Django, you are expected to have experience working with Django, Django REST framework, and Python. Familiarity with RESTful APIs and OAuth concepts will also be beneficial. Now, let’s dive in!
What is OAuth?
OAuth (Open Authorization) is an open standard for authorization that allows users to grant third-party applications limited access to their resources without sharing their credentials. It's commonly used for secure API authentication in web and mobile applications. OAuth 2.0 is the latest version of the protocol and is widely adopted across the industry.
What Oauth is not: OAuth vs SSO
As a backend developer, it's essential to understand that OAuth is not a user authentication system; it's a framework for authorization, allowing third-party applications to access specific user data without handling the initial login. It doesn't replace or manage user authentication or handle secure storage of login credentials, which you'll still need in your application. In practical terms, OAuth is like giving someone a special key to access a specific room in a building without giving them the master key to the entire building. It's focused on granting access to specific resources. On the other hand, Single Sign-On (SSO) is like having a master key that opens all the doors in the building. Once you've authenticated, you can access multiple rooms without needing separate keys (logins). In clear terms, OAuth is about limited access to specific resources, while SSO is one login providing access to multiple services or applications within a domain. Now, let’s get hands-on!
Simple Django OAuth project
We’ll need a few packages to implement OAuth in Django. Here are the essential packages and their installation commands.
Create and activate a virtual environment called venv:
python -m venv venv
source venv/bin/activate
Install the following packages:
pip install django-oauth-toolkit djangorestframework djangoPin all the packages installed by running the command:
pip freeze > requirements.txt Create a new django project and navigate into it using the command below:
django-admin startproject oauth_login
cd oauth_login
Navigate to your settings.py file and add the following to your installed apps:
    # Application definition

INSTALLED_APPS = [
     …,
    'oauth2_provider',
        'rest_framework',
]
Include the snippet below as well in your settings.py:
# OAuth Toolkit Settings
OAUTH2_PROVIDER = {
    'ACCESS_TOKEN_EXPIRE_SECONDS': 3600,  # Token expiration time (1 hour)
    'SCOPES': {'read': 'Read scope', 'write': 'Write scope', 'groups': 'Access to your groups'}
}
# OAUTH2_PROVIDER.SCOPES setting parameter contains the scopes that the application will be aware of, so we can use them for permission check.
Add this to let REST_FRAMEWORK use the new auth backend:
    REST_FRAMEWORK = {
    'DEFAULT_AUTHENTICATION_CLASSES': (
        'oauth2_provider.contrib.rest_framework.OAuth2Authentication',),
    'DEFAULT_PERMISSION_CLASSES': (
        'rest_framework.permissions.IsAuthenticated',)
}
# in case we are redirected to a login view, we want to use the admin login. You can edit this to use your own login template
LOGIN_URL = 'admin:login'
Create a Django app called login, navigate into the directory, and create a new serializers.py file using the command:
python manage.py startapp login
cd login
touch serializers.py
Paste in the following code snippets in the serializers.py file:
# login/serializers.py
from rest_framework import serializers
from django.contrib.auth.models import User, Group
# first we define the serializers
class UserSerializer(serializers.ModelSerializer):
    class Meta:
        model = User
        fields = ('username', 'email', "first_name", "last_name")
class GroupSerializer(serializers.ModelSerializer):
    class Meta:
        model = Group
        fields = ("name")
Create views for your API by defining view classes in your app views.py. Here, we'll create a simple User view:
    # login/views.py

from rest_framework import generics
from django.contrib.auth.models import User
from .serializers import UserSerializer

class UserList(generics.ListCreateAPIView):
    queryset = User.objects.all()
    serializer_class = UserSerializer

class UserDetail(generics.RetrieveUpdateDestroyAPIView):
    queryset = User.objects.all()
    serializer_class = UserSerializer
Set up the URLs for your app by creating a urls.py file in your app directory (login), and include the views you created:
from django.urls import path
from .views import UserList, UserDetail

urlpatterns = [
    path('users/', UserList.as_view(), name='user-list'),
    path('users/<int:pk>/', UserDetail.as_view(), name='user-detail'),
]
Include your app's URLs in your project (oauth_login) urls.py:
# oauth_login/urls.py

from django.contrib import admin
from django.urls import path, include

urlpatterns = [
    path('admin/', admin.site.urls),
    path('api/', include('login.urls')),
    path('oauth/', include('oauth2_provider.urls', namespace='oauth2_provider')),
]
Register your app in your project’s settings. Your INSTALLED_APPS setting should look like this:
# oauth_login/settings.py

# Application definition

INSTALLED_APPS = [
    'django.contrib.admin',
    'django.contrib.auth',
    'django.contrib.contenttypes',
    'django.contrib.sessions',
    'django.contrib.messages',
    'django.contrib.staticfiles',
    'oauth2_provider',
    'rest_framework',
    'login.apps.LoginConfig', # this is the app we created
]
Now that we have gotten this far, it is time to apply migrations to create the necessary database tables. Navigate out of the login app and run the following commands in your terminal:
cd ..
python manage.py makemigrations
python manage.py migrate
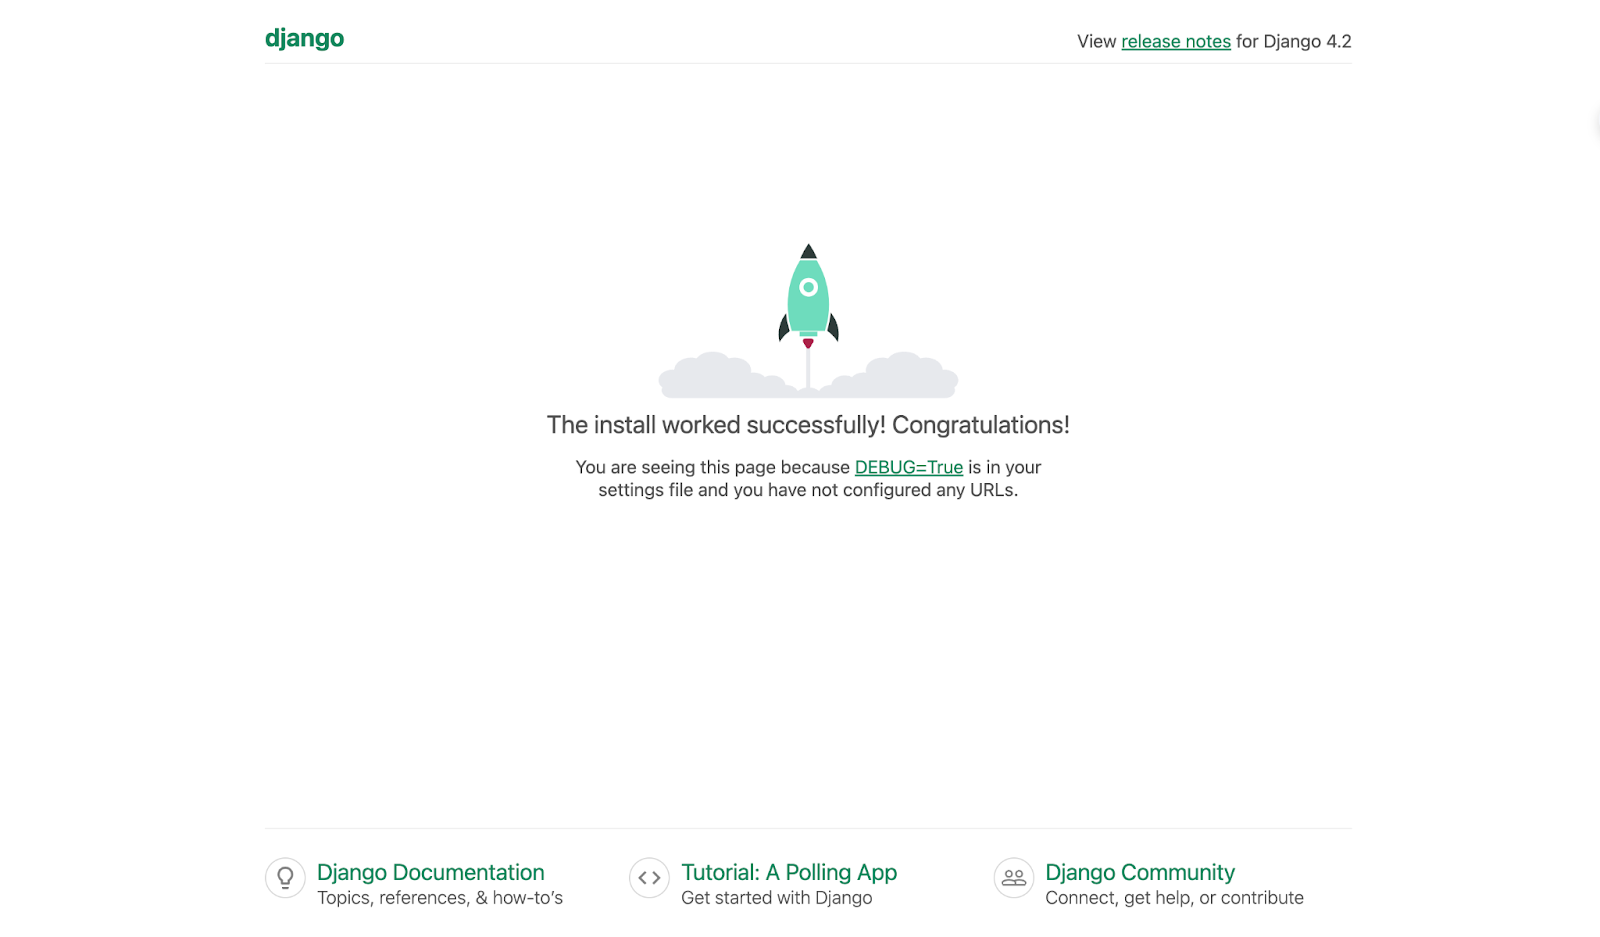
python manage.py runserverThe server should be live on http://127.0.0.1:8000/.
Now, create a test superuser using the commands below:
python manage.py createsuperuserEnter any admin details of your choice and save them somewhere. We’ll be using it to login in the next step. Visit http://localhost:8000/oauth/applications/register/ to add an application with the following data (NB: You’ll need to login to the admin interface with the new credentials created earlier):
Name: Any name you choose
Client Type: confidential
Authorization Grant Type: Resource owner password-based
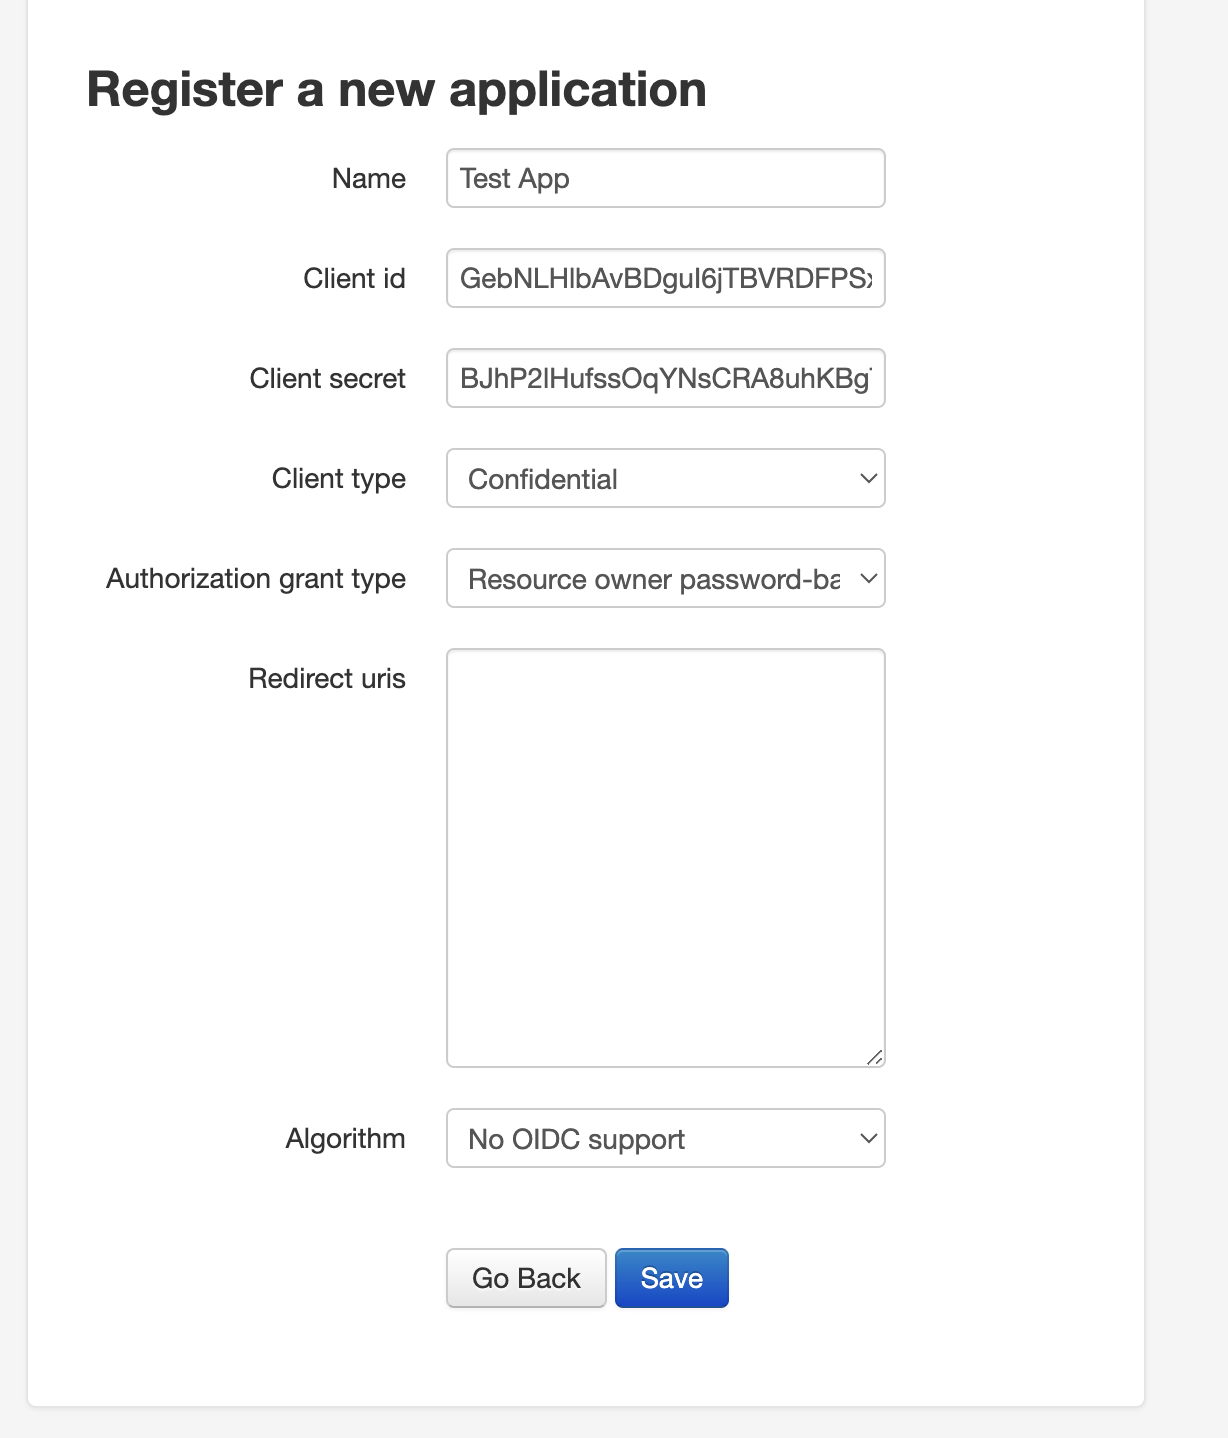
N/B: Copy the Client id and Client secret and save it somewhere. We’ll be using it in the next step.
So now, to test our oauth login, we’ll create an example.py file in our login directory. This file would act as our client from which we’ll test the login implementation. Copy and paste the code snippet below in the newly created example.py file:
import requests
import json

oauth_server_url = "http://localhost:8000"

# Replace the credentials below with your own

client_id = "qai64WhMT2YtEpS4gfXcfhGCuim9u22wvhTZdu0c"  # client ID from my app
client_secret = "NfO2QcdVlB6xCPLwdsmu5FojfpK3GKtLGlEwazo2yEJlgPfxQHTK26xGtTBUiPkZ3iLioFtzQf0JAPaLjy9e2dk0h96KIF4AXkvfolUbwa7Rm7BzeIxR5J904sakGvXj"  # client secret from my app
username = "admin"  # my user
password = "Ploik90*"  # user's password

# Function to obtain an OAuth token
def get_access_token():
    token_url = f"{oauth_server_url}/oauth/token/"
    data = {"grant_type": "password", "username": username, "password": password}
    auth = (client_id, client_secret)

    response = requests.post(token_url, data=data, auth=auth)

    if response.status_code == 200:
        access_token = response.json().get("access_token")
        return access_token
    else:
        print(f"Failed to obtain access token. Status code: {response.status_code}")
        print(response.text)
        return None

# Function to make an authenticated API request
def make_authenticated_api_request(access_token):
    api_url = f"{oauth_server_url}/api/users/"
    headers = {"Authorization": f"Bearer {access_token}"}

    response = requests.get(api_url, headers=headers)

    if response.status_code == 200:
        return response.json()
    else:
        print(f"Failed to make the API request. Status code: {response.status_code}")
        print(response.text)
        return None

# Obtain an OAuth token
access_token = get_access_token()

if access_token:
    # Make an authenticated API request
    api_response = make_authenticated_api_request(access_token)
if api_response:
    print("API Response:")
    print(json.dumps(api_response, indent=4))
In the script above, we created two functions, get_oauth_token and make_authenticated_api_request, to handle getting our access token and making a request to our oauth server. If the request to get the access token is successful, we invoke the make_authenticated_api_request function to make the fetch to the users endpoint, passing the access token as an argument. If that’s successful, we print the response in our terminal, showing us a list of users on the server.
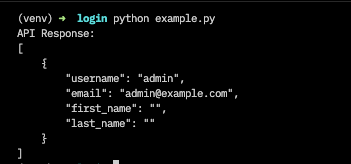
Now, execute the example.py file in the terminal using the command:
python example.py We should get the following response:
NB: We created a python script to test the oauth implementation for simplicity. However, the expected thing to do is to create a dedicated login endpoint which would be consumed from the client (browser, mobile app, etc.). Also, remember that the Client id and Client secret should only be used server-side for security purposes.
Conclusion
In conclusion, implementing OAuth2 in Django using the Django OAuth Toolkit and Django REST framework provides a robust and secure authentication and authorization mechanism for your web applications and APIs. By following the steps outlined in this article, you can ensure that your users' data and resources are protected while enabling third-party applications to interact with your services. Feel free to expand and explore other integration techniques. I have added some extra articles for your use.
OAuth2 allows you to delegate limited access to your resources by generating access tokens, effectively balancing the need for security and convenience. It's crucial to understand that while OAuth2 is a powerful tool for authorization, it's not a replacement for user authentication, and both components are essential to building a comprehensive authentication system.
Resources
- OAuth Book: https://www.oauth.com/
- Django OAuth Toolkit Docs: https://django-oauth-toolkit.readthedocs.io/en/latest/getting_started.html
- Toptal Oauth Tutorial: https://www.toptal.com/django/integrate-oauth-2-into-django-drf-back-end